See the PT Manager tab and manage your vulnerabilities and project easily :)
How to use?
After installation, the PT Manager tab will be added to Burp.
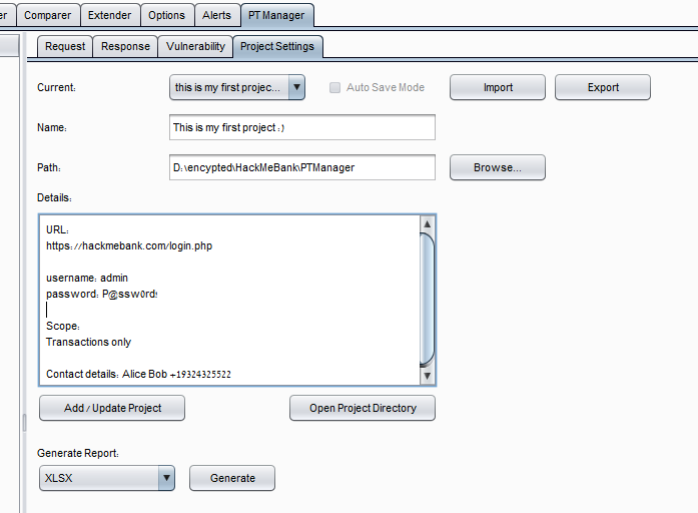
Project Settings Tab:
Open the Project Settings tab (PT Manager -> Project Settings) and create a new project, make sure you are creating it under the encrypted partition.
“Details” text area can be used in order to save any details about the project such as URLs, credentials, contact details, or any other comments.
Generate report section can be used in order to generate project report in HTML, XLSX, DOCX, TXT.
import and export buttons can be used in order to send other people reports and allows them import it in the extension.
“Open project directory” – will open your project directory, as you would expect ? :)
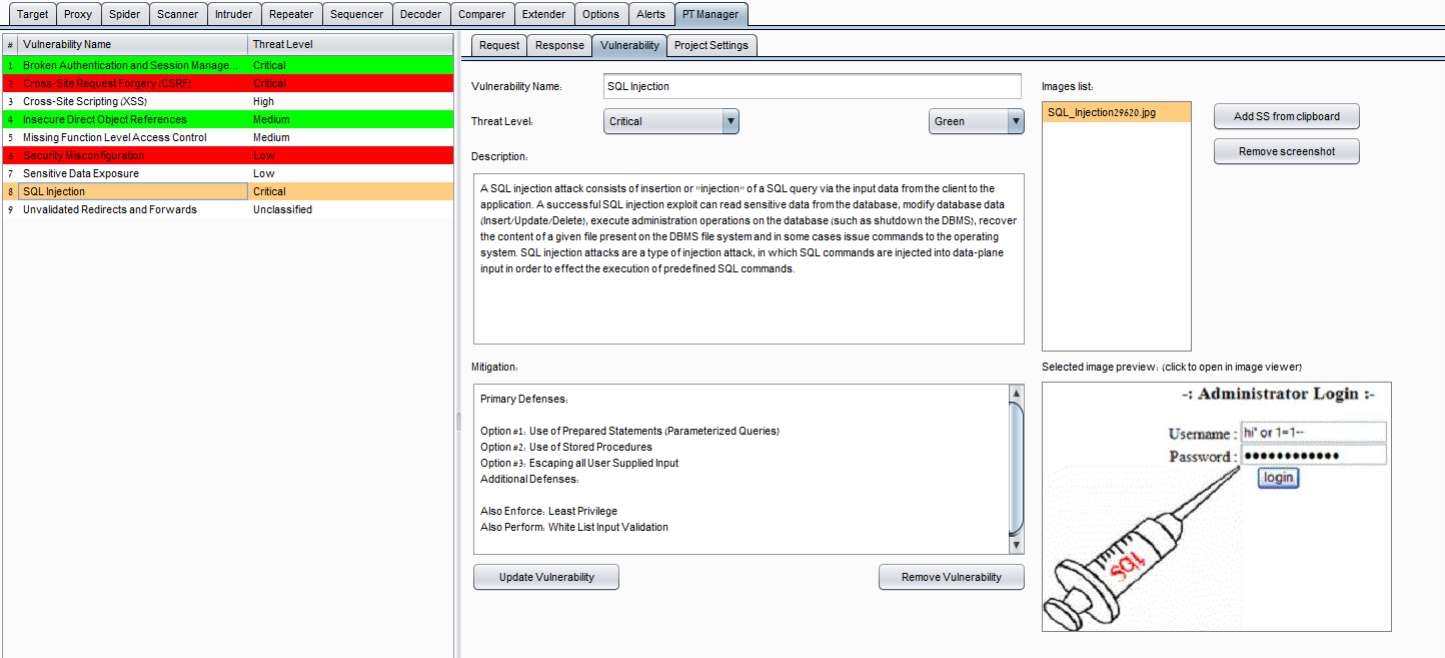
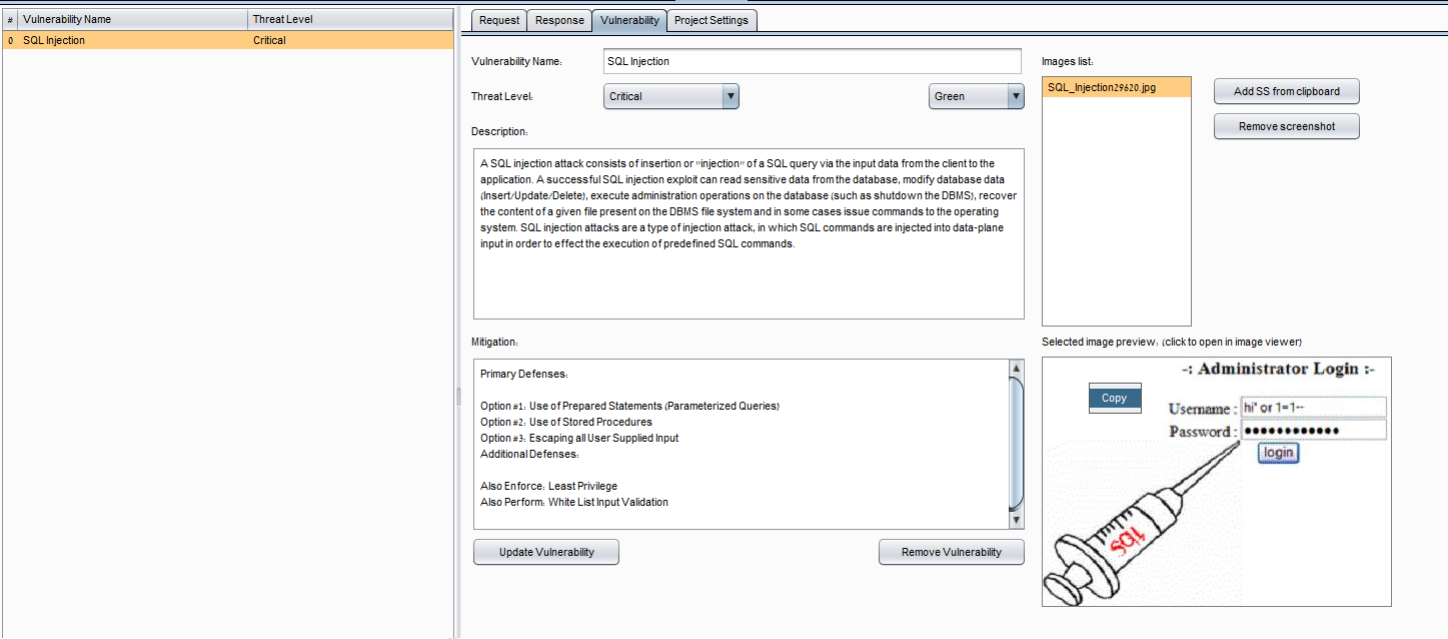
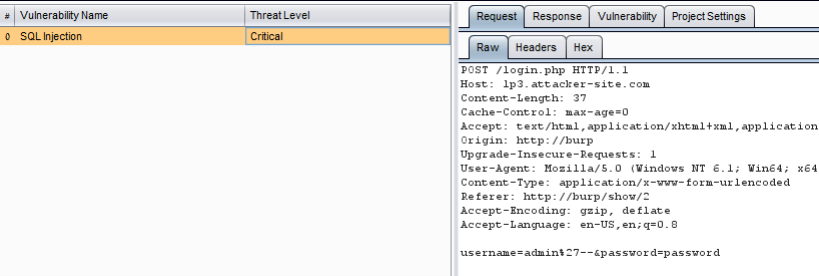
Vulnerability Tab:
Open the Vulnerability tab and create a new vulnerability.
“Color:” combobox can be used in order to change a specific vulnerability’s background color. it can be used to let you know if the vulnerability was verified (set it green) or if it is false positive (so set it to red or just remove the vulnerability)
“Add SS from clipboard” button will copy a captured image that and save it on your clipboard. It is also possible to add it manually by pasting the jpg file into the vulnerability folder.
It is possible to right-click the selected preview image in order to copy the file into the clipboard in case you would like to get a specific image
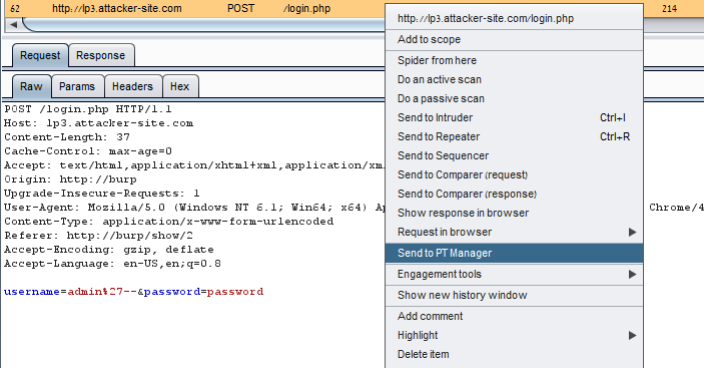
request and response tab will include the requset and response of the vulnerable requset. it is possible to attach specific requests and responses to a vulnerability by right-clicking the request/response from anywhere in Burp then clicking on “Send to PT Manager”